สร้าง Design System สำหรับ React โดยใช้ Styleguidist
หลายๆ บริษัทหรือ developer หลายๆ คนต่างก็รู้จัก UI library มาแล้วทั้งนั้น ซึ่งแต่ละ library ก็มีหน้าตา วิธีใช้งาน หรือข้อจำกัดที่แตกต่างกันออกไป หลายบริษัทจึงหันมาสร้างเป็น design system เป็นของตัวเองเพื่อให้ใช้งานได้ตามจุดประสงค์มากขึ้น ซึ่งการสร้าง design system / UI library ขึ้นมานั้นก็ควรมี document อธิบายการใช้งานด้วย ซึ่ง Styleguidist เป็น tool ที่จะช่วยให้คุณสร้าง design system / UI library เป็นของตัวเองได้อย่างง่ายขึ้น
รู้จักกับ Styleguidist
Styleguidist เป็น tool ที่ช่วยให้เราสร้าง UI components ของ React framework ได้ง่ายขึ้น ซึ่งมีข้อดีคือทำให้เราสร้าง document ได้ง่ายมากๆ เพียงแค่สร้างไฟล์ markdown ที่หลายๆ คนคงรู้จักกันดีอยู่แล้วนั่นเอง
มาเริ่มทำ Design System ไว้ใช้เองกันเถอะ
ในบทความนี้จะพาทำ Styleguidist โดยใช้ React ซึ่งก่อนอื่นเลยเราต้อง project ขึ้นมาก่อน โดยในที่นี้จะสร้างโดย Create React App
npx create-react-app my-design-system
cd my-design-system
หลังจากนั้นก็ทำการติดตั้งพระเอกของเราเข้าไป คือ Styleguidist นั่นเอง
npm install react-styleguidist --save-dev// or
yarn add react-styleguidist --dev
เมื่อทำการติดตั้งเรียบร้อยแล้ว ให้ทำการเพิ่ม scripts ใน package.json เพื่อให้รันคำสั่งได้ง่ายขึ้น
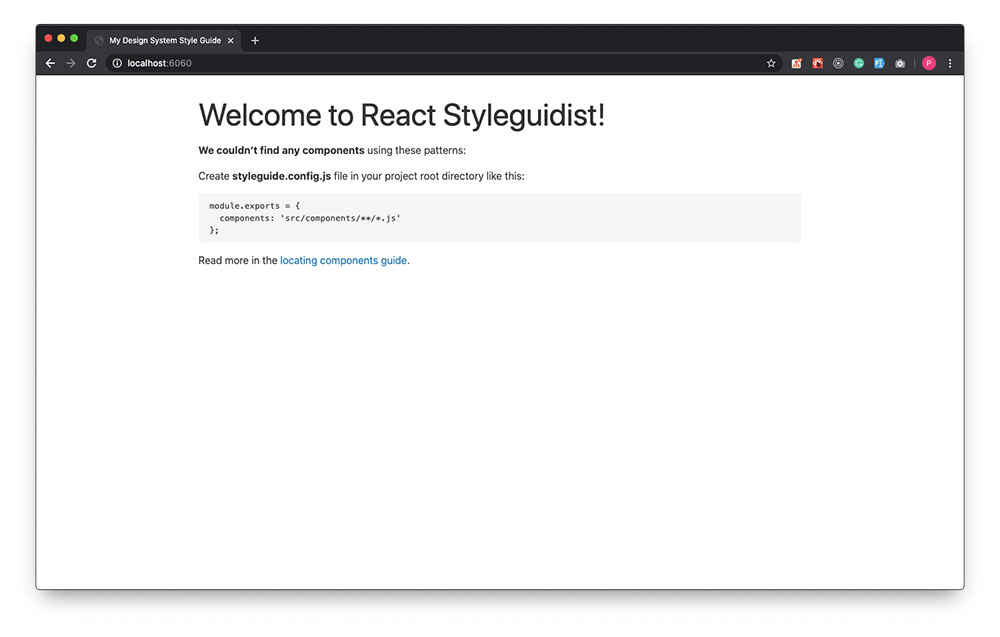
"styleguide": "styleguidist server","styleguide:build": "styleguidist build"ทีนี้ก็ลองใช้คำสั่งเพื่อรัน Styleguidist ขึ้นมาแล้วดูผลลัพธ์ที่ http://localhost:6060
npm run styleguide// or
yarn styleguide
เราจะพบกับหน้าตาแบบนี้ ซึ่งไม่ต้องตกใจ ที่มันขึ้นแบบนี้เนื่องจากเรายังไม่มี component เลยนั่นเอง
ทีนี้เรามาลองสร้าง component เป็นของตัวเองเลยดีกว่า โดยในที่นี้จะสร้างเป็น input component เพื่อให้เข้าใจง่าย
เริ่มต้นคือสร้าง component ขึ้นมาก่อน โดยในที่นี้จะสร้างไว้ที่ src/components/Input.js
// src/components/Input.js
import React from 'react'
const Input = ({ style, ...props }) => ( <input   {...props}   style={{     color: 'deepskyblue',     border: '2px solid deepskyblue',     outline: 'none',     fontSize: 20,     borderRadius: 10,     width: 500,     padding: 10,     ...style   }} />)
export default Input
และเมื่อลอง refresh หน้า browser ดูเราก็จะพบว่าหน้าตาของเว็บเราเปลี่ยนไปแล้ว
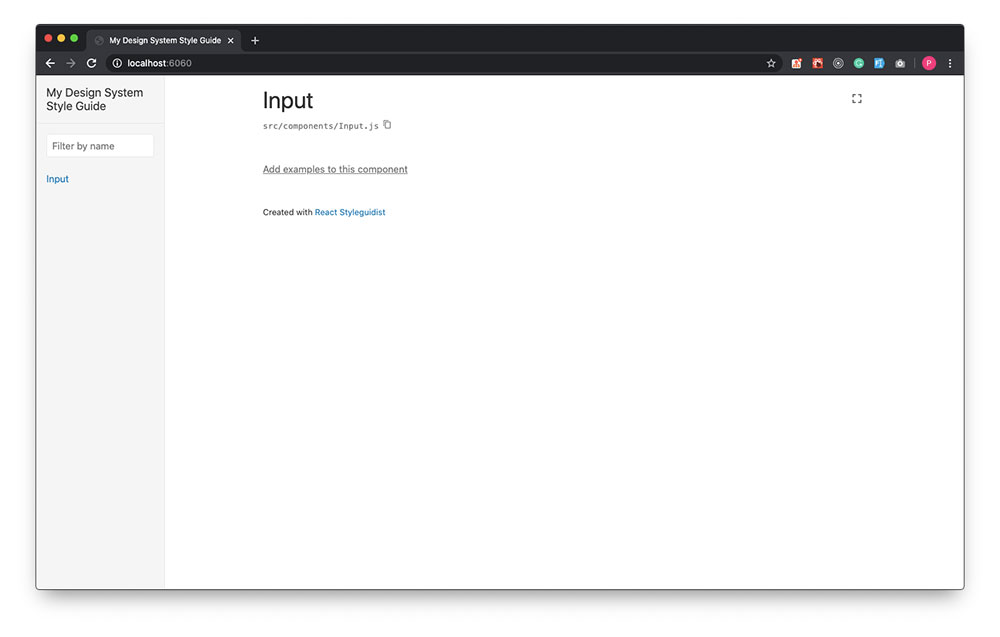
ซึ่งที่เห็นโล่งๆ แบบนี้เพราะว่าเรายังไม่ได้ทำการสร้าง document ให้กับ component โดยวิธีการสร้าง document ก็ง่ายมากๆ เพียงแค่สร้างไฟล์ markdown ที่มีชื่อเดียวกับ component ที่ต้องการ
โดยในที่นี้เราต้องการสร้าง document ให้กับ input component เราก็สร้างไฟล์ Input.md ไว้ที่เดียวกับไฟล์ component ได้เลย
<!-- src/components/Input.md -->
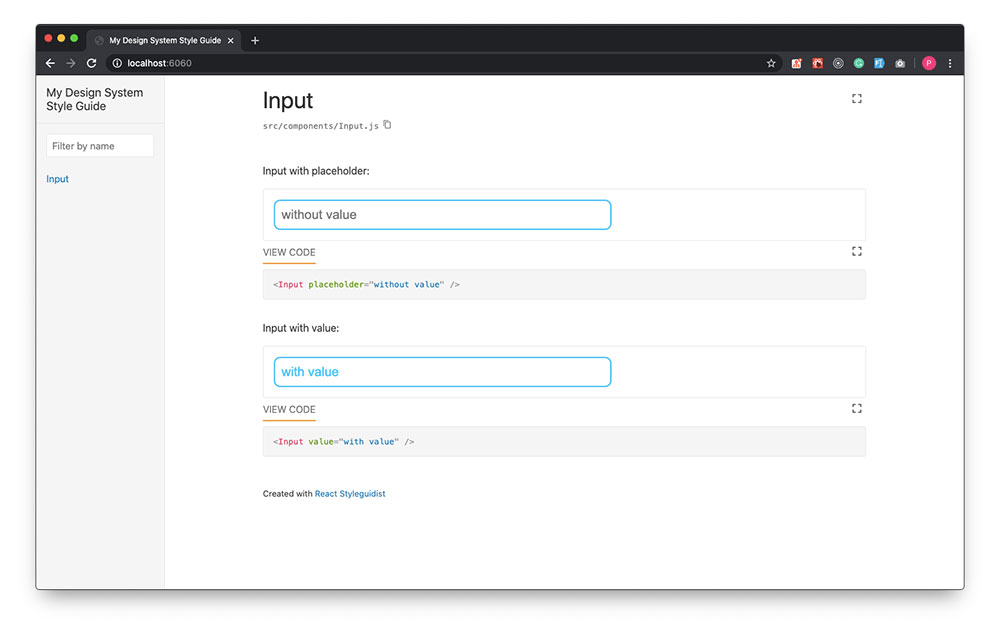
Input with placeholder:```js<Input placeholder="without value" />```
Input with value:```js<Input value="with value" />```ทีนี้เราก็ได้ document หน้าตาสวยๆ มาแบบง่ายๆ แล้ว
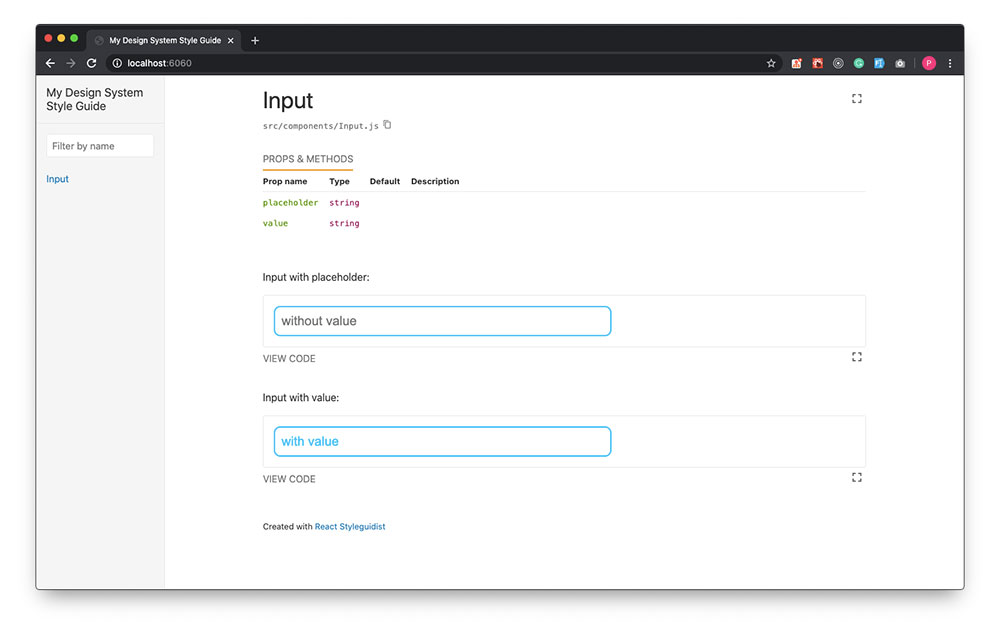
แต่เดี๋ยวก่อน! Styleguidist ทำอะไรได้มากกว่านั้น มันสามารถทำ document เพื่อบอกรายละเอียด props ของ component ได้อีกด้วย~ โดยวิธีการทำก็ไม่ได้ยาก เพียงใช้งานร่วมกับ prop-types เท่านั้น
เริ่มต้นต้องทำการติดตั้ง prop-types เข้า project ก่อน
npm install prop-types// or
yarn add prop-types
จากนั้นทำการเพิ่ม prop-types ให้กับ component
// src/components/Input.js
import React from 'react'
import PropTypes from 'prop-types' // add this line
const Input = ({ style, ...props }) => (  <input    {...props}    style={{      color: 'deepskyblue',      border: '2px solid deepskyblue',      outline: 'none',      fontSize: 20,      borderRadius: 10,      width: 500,      padding: 10,      ...style    }}  />)// add this codes
Input.propTypes = {  value: PropTypes.string,  placeholder: PropTypes.string}
export default Input
เมื่อลอง restart server จะพบว่ามีรายละเอียด props ขึ้นมาแล้ว
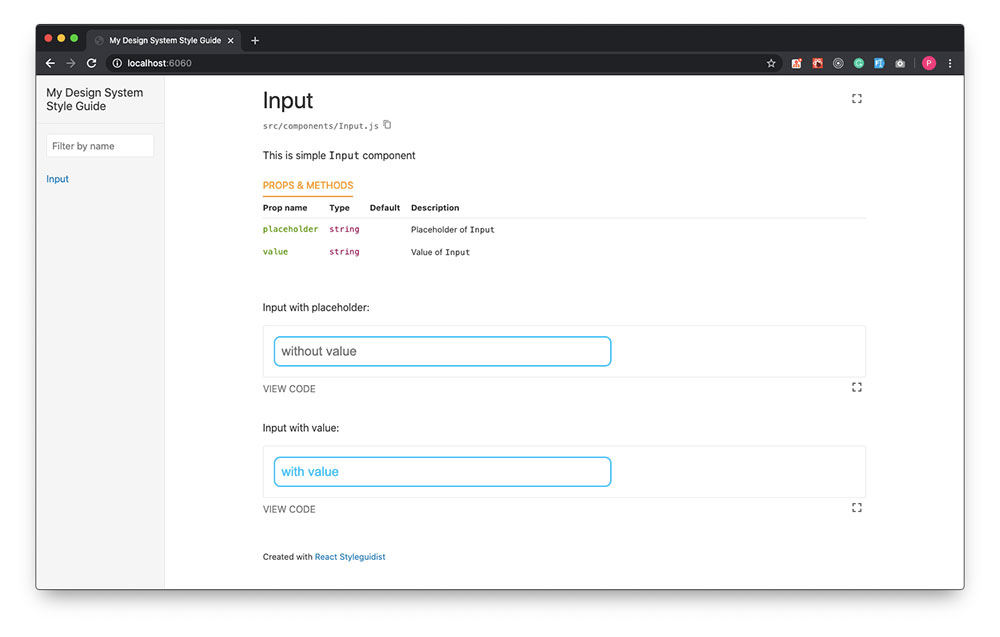
แล้วถ้าเราอยากใส่คำอธิบายให้กับ component หรือ props ละทำยังไงล่ะ? คำตอบคือไม่ยาก ก็ใส่ comment ให้มันสิ!
// src/components/Input.js
import React from 'react'
import PropTypes from 'prop-types'/** * This is simple `Input` component */
const Input = ({ style, ...props }) => (  <input    {...props}    style={{      color: 'deepskyblue',      border: '2px solid deepskyblue',      outline: 'none',      fontSize: 20,      borderRadius: 10,      width: 500,      padding: 10,      ...style    }}  />)
Input.propTypes = {  /** Value of `Input` */  value: PropTypes.string,  /** Placeholder of `Input` */  placeholder: PropTypes.string}
export default Input
เพียงเท่านั้นเราก็ได้ description ของทั้ง component และ props มาอ่านให้เข้าใจง่ายๆ แล้ว
บทสรุป
Styleguidist เป็น tool ที่ช่วยให้เราสร้าง design system / UI library ของ React framework ได้ง่ายขึ้น อีกทั้งยังสามารถทำ document ได้อย่างสะดวกรวดเร็ว ซึ่งในบทความนี้เป็นเพียงการสอนการทำ Styleguidist แบบง่ายๆ เท่านั้น ซึ่งหากทุกท่านสนใจสามารถลองเอาไปพัฒนาต่อได้
ติดตามบทความอื่นๆ จากเราได้ที่ SennaLabs Blogs


Subscribe to follow product news, latest in technology, solutions, and updates
Other articles for you


Let’s build digital products that are simply awesome !
We will get back to you within 24 hours!Go to contact us