สร้าง Design System สำหรับ React โดยใช้ Storybook
Share
หลายๆ บริษัทหรือ developer หลายๆ คนต่างก็รู้จัก UI library มาแล้วทั้งนั้น ซึ่งแต่ละ library ก็มีหน้าตา วิธีใช้งาน หรือข้อจำกัดที่แตกต่างกันออกไป หลายบริษัทจึงหันมาสร้างเป็น design system เป็นของตัวเองเพื่อให้ใช้งานได้ตามจุดประสงค์มากขึ้น ซึ่งการสร้าง design system / UI library ขึ้นมานั้นก็ควรมี document อธิบายการใช้งานด้วย ซึ่ง Storybook เป็น tool ที่จะช่วยให้คุณสร้าง design system / UI library เป็นของตัวเองได้อย่างง่ายขึ้น
รู้จักกับ Storybook
Storybook เป็น tool ที่ช่วยให้เราสร้าง UI components ได้ง่ายขึ้น ซึ่งสามารถเขียนได้หลาย framework เช่น React, React Native, Vue, Angular หรือเขียนเป็น UI components ของ HTML ก็ได้
ข้อดีของ Storybook คือสามารถสร้างตัว UI ให้เห็นภาพได้ทันที designer เข้ามาดูแล้วเข้าใจได้ง่าย ทำ document ได้ง่าย อีกทั้งยังมีคนใช้เยอะมากๆ อีกด้วย เช่น Airbnb, Uber, Sematic-UI เป็นต้น (ดูเพิ่มเติมได้ที่ https://storybook.js.org/docs/examples/)
มาเริ่มทำ Design System ไว้ใช้เองกันเถอะ
ในบทความนี้จะพาทำ Storybook โดยใช้ React ซึ่งก่อนอื่นเลยเราต้อง project ขึ้นมาก่อน โดยในที่นี้จะสร้างโดย Create React App
npx create-react-app my-design-system
cd my-design-system
หลังจากนั้นก็ทำการติดตั้งพระเอกของเราเข้าไป คือ Storybook นั่นเอง
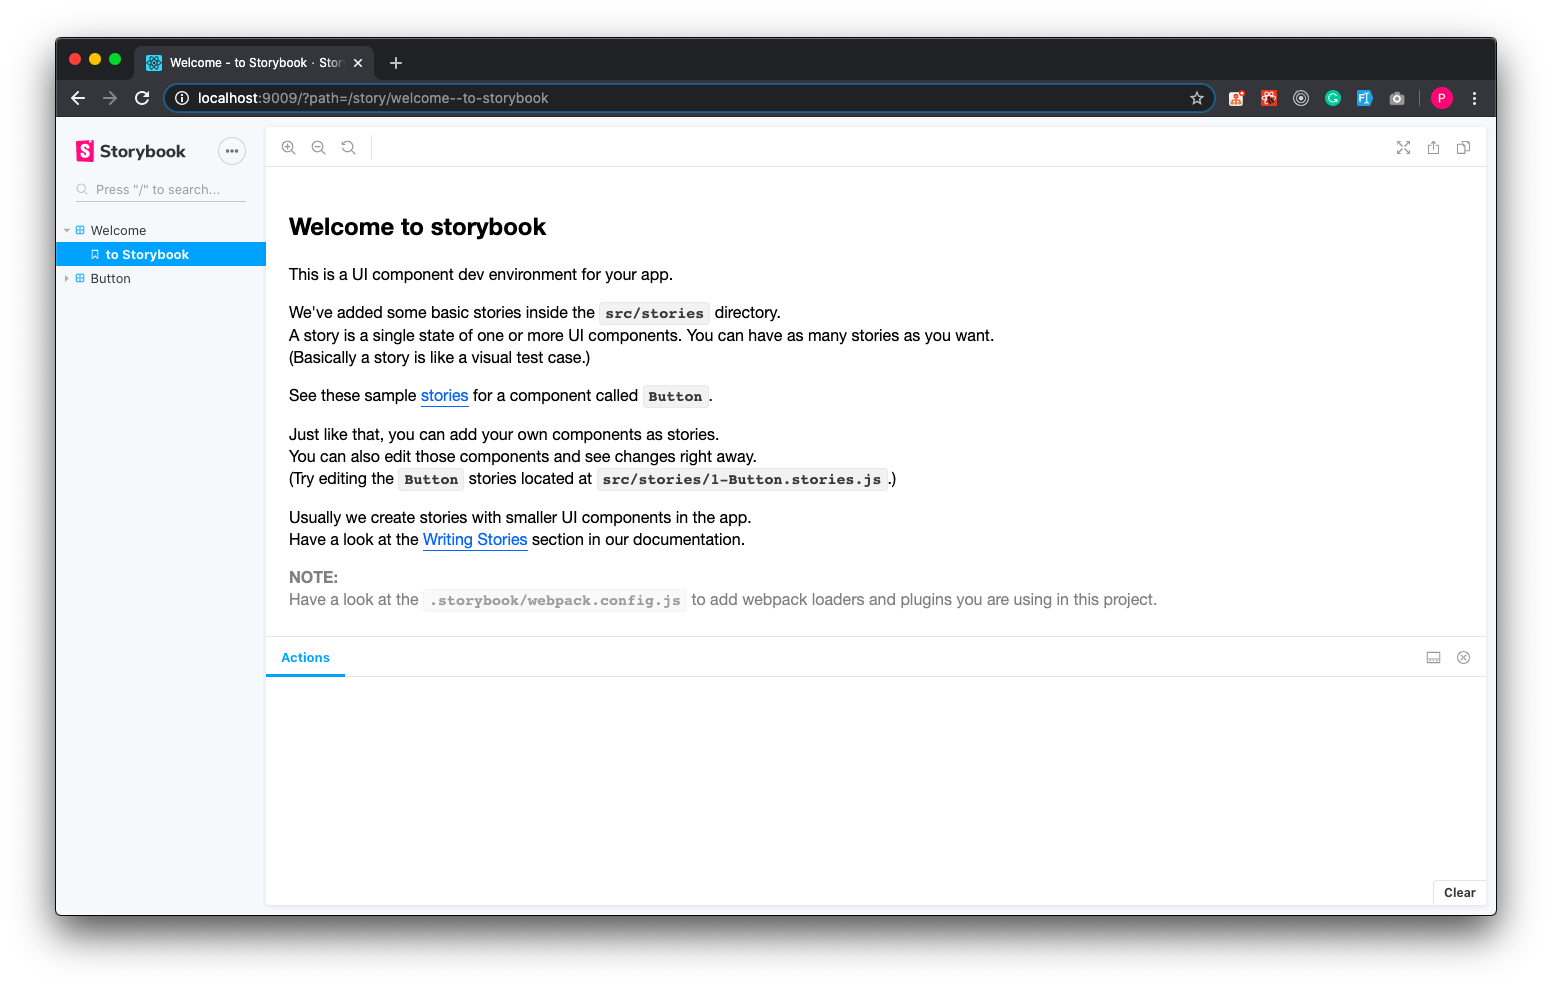
npx -p @storybook/cli sb init --type react_scriptsทีนี้ก็ลองใช้คำสั่งเพื่อรัน Storybook ขึ้นมาแล้วดูผลลัพธ์ที่ http://localhost:9009
npm run storybook// or
yarn storybook
ซึ่ง Storybook จะสร้าง folder ให้เรา 2 folders ด้วยกันคือ
- .storybook - เอาไว้ตั้งค่า config ต่างๆ ซึ่งหากต้องการเพิ่ม addon ก็เพิ่มได้ที่นี่
- src/stories - รวม stories ต่างๆ ที่จะเอามาแสดงในหน้าเว็บไซต์
ทีนี้เรามาลองสร้าง component เป็นของตัวเองเลยดีกว่า โดยในที่นี้จะสร้างเป็น input component เพื่อให้เข้าใจง่าย
เริ่มต้นคือสร้าง component ขึ้นมาก่อน โดยในที่นี้จะสร้างไว้ที่ src/components/Input.js
// src/components/Input.js
import React from 'react'
const Input = ({ style, ...props }) => ( <input   {...props}   style={{     color: 'deepskyblue',     border: '2px solid deepskyblue',     outline: 'none',     fontSize: 20,     borderRadius: 10,     width: 500,     padding: 10,     ...style   }} />)
export default Input
หลังจากนั้นก็ต้องไปสร้างไฟล์ story ไว้ที่ src/stories/Input.stories.js
// src/stories/Input.stories.js
import React from 'react';
import Input from '../components/Input'
export default { title: 'Input', component: Input,};
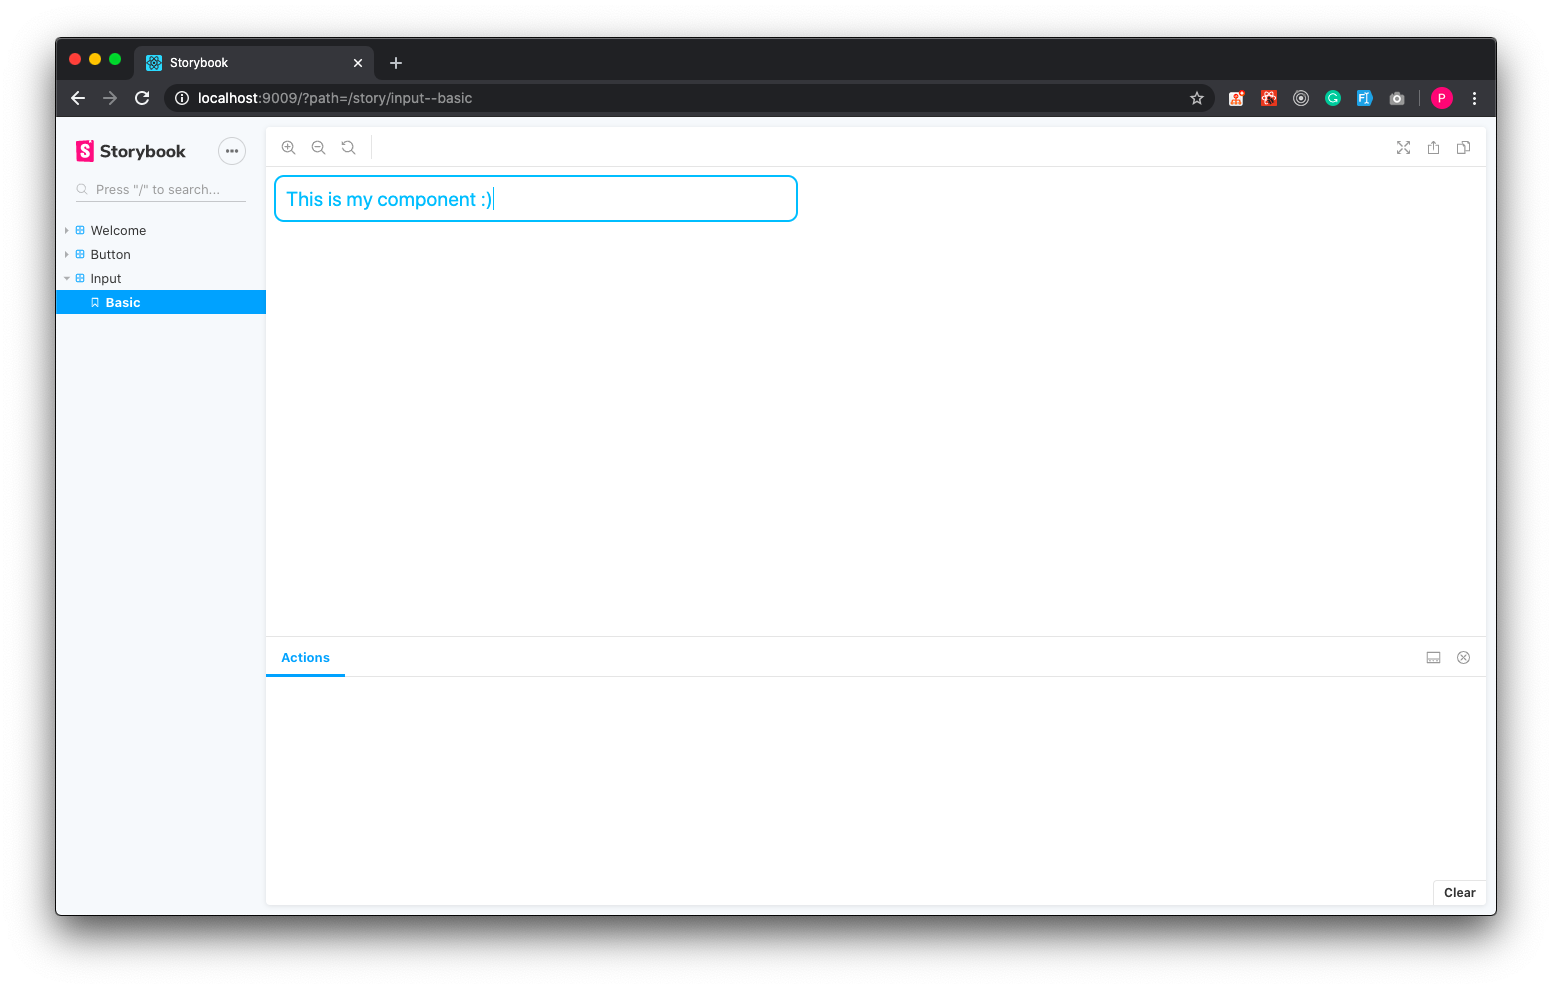
export const Basic = () => <Input />;
และเมื่อกลับไปดูบน browser ก็จะพบ component ของเราขึ้นมาแล้วนั้นเอง
ทีนี้เราก็มี design system ไว้ใช้เองแล้ว
Storybook Addons
แต่เดี๋ยวก่อน ทำ design system แต่นี้ก็ไม่ค่อยมีประโยชน์เท่าไหร่น่ะสิ document ก็ไม่มี ไม่ต้องกังวลไป ทาง Storybook ได้มี addon ไว้ให้เราเลือกใช้มากมาย ซึ่งแต่ละตัวก็มีประโยชน์และใช้ง่ายมากๆ เรามาลองทำความรู้จักกับ addon บางตัวเลยดีกว่า
Knobs
Knobs เป็น addon ที่ช่วยให้เราสามารถ interact กับ component ได้ เช่น ถ้าส่ง props นี้แล้วจะเกิดอะไรขึ้น
เริ่มต้นจากการเพิ่ม Knobs เข้าไปใน project ก่อน
npm install @storybook/addon-knobs --save-dev// or
yarn add @storybook/addon-knobs --dev
จากนั้นให้ทำการเพิ่ม Knobs เข้าไปใน .storybook/main.js
// .storybook/main.js
module.exports = { stories: ['../src/**/*.stories.js'], addons: [   '@storybook/preset-create-react-app',   '@storybook/addon-actions',   '@storybook/addon-links',   '@storybook/addon-knobs/register', // add this line ],};
ทีนี้เราก็สามารถใช้ Knobs ได้แล้ว โดยวิธีให้ก็ไม่ยาก เพียงแต่เราครอบ function ของ Knobs ไว้ให้กับ props ที่เราต้องการ interact ด้วย
// src/stories/Input.stories.js
import React from 'react';
import { withKnobs, text, boolean } from '@storybook/addon-knobs'; // add this line
import Input from '../components/Input'
export default { title: 'Input', component: Input, decorators: [withKnobs], // add this line};
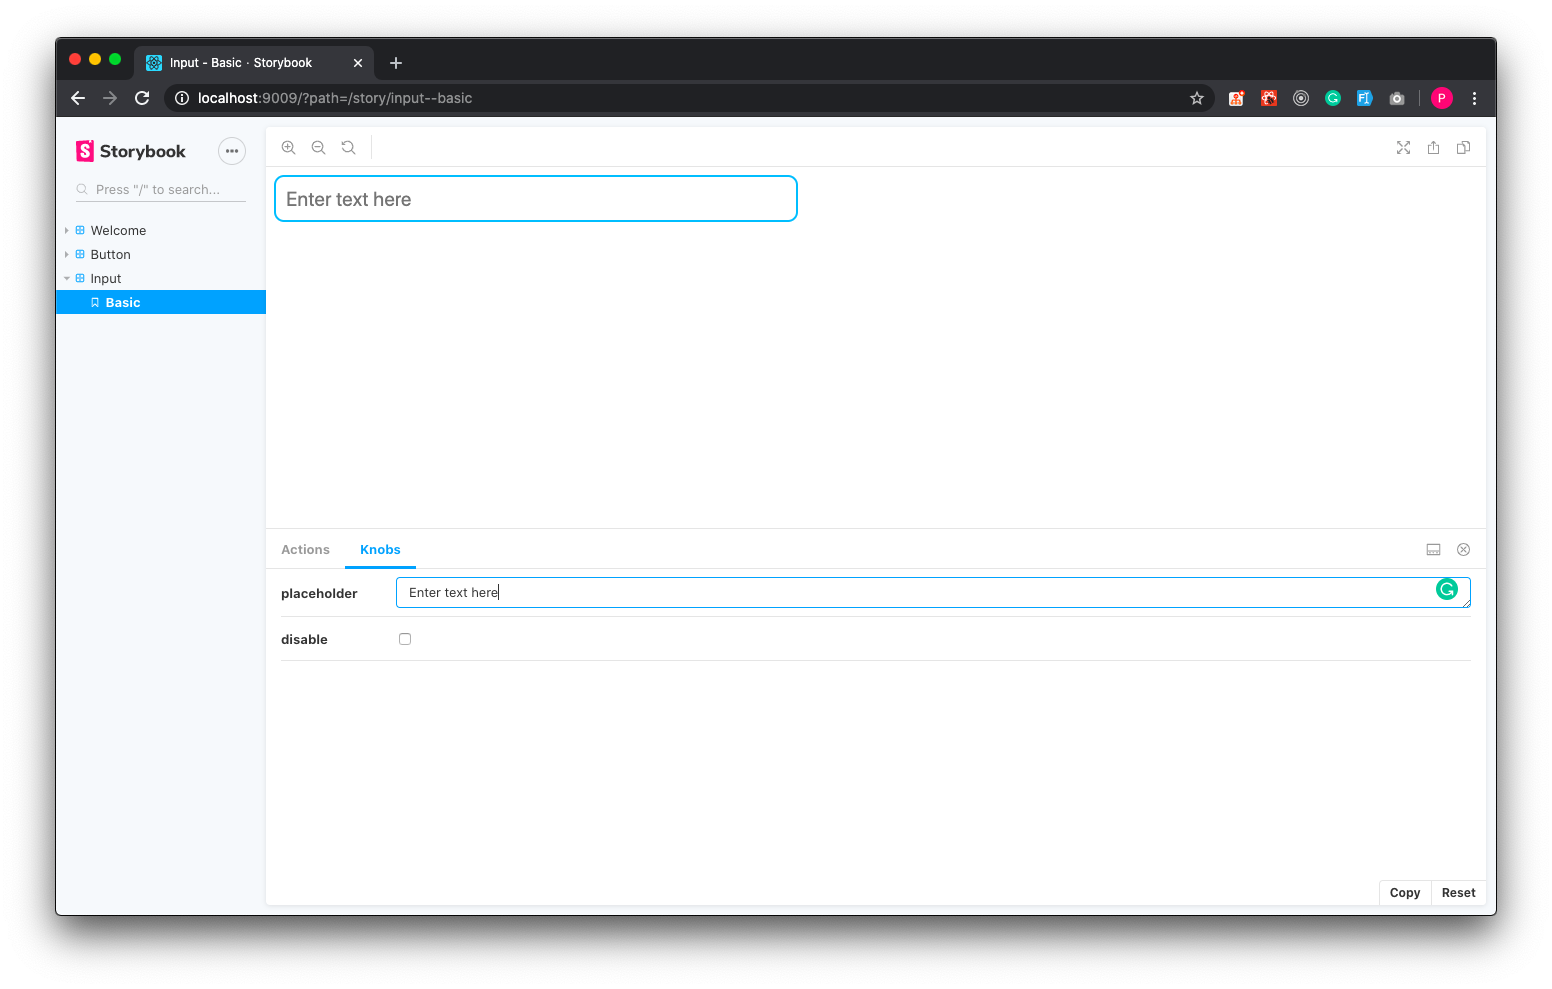
export const Basic = () => ( <Input   placeholder={text('placeholder', 'Enter text here')} // add this line   disabled={boolean('disable', false)} // add this line />);
เมื่อเรา restart Storybook จะพบว่ามี tab Knobs เพิ่มขึ้นมา และเมื่อเราแก้ไขค่าต่างๆ UI ที่ได้ก็จะเปลี่ยนไปตามค่านั้นๆ
Docs
Docs เป็น addon ที่ช่วยให้เราสามารถเขียน document ของ component ได้ง่ายขึ้น ซึ่งมีวิธีการเขียนเป็น markdown เริ่มต้นจากการเพิ่ม Docs เข้าไปใน project ก่อน
npm install @storybook/addon-docs --save-dev// or
yarn add @storybook/addon-docs --dev
จากนั้นให้ทำการเพิ่ม Docs เข้าไปใน .storybook/main.js
// .storybook/main.js
module.exports = { stories: ['../src/**/*.stories.(js|mdx)'], // edit this line addons: [   '@storybook/preset-create-react-app',   '@storybook/addon-actions',   '@storybook/addon-links',   '@storybook/addon-knobs/register',   '@storybook/addon-docs', // add this line ],};
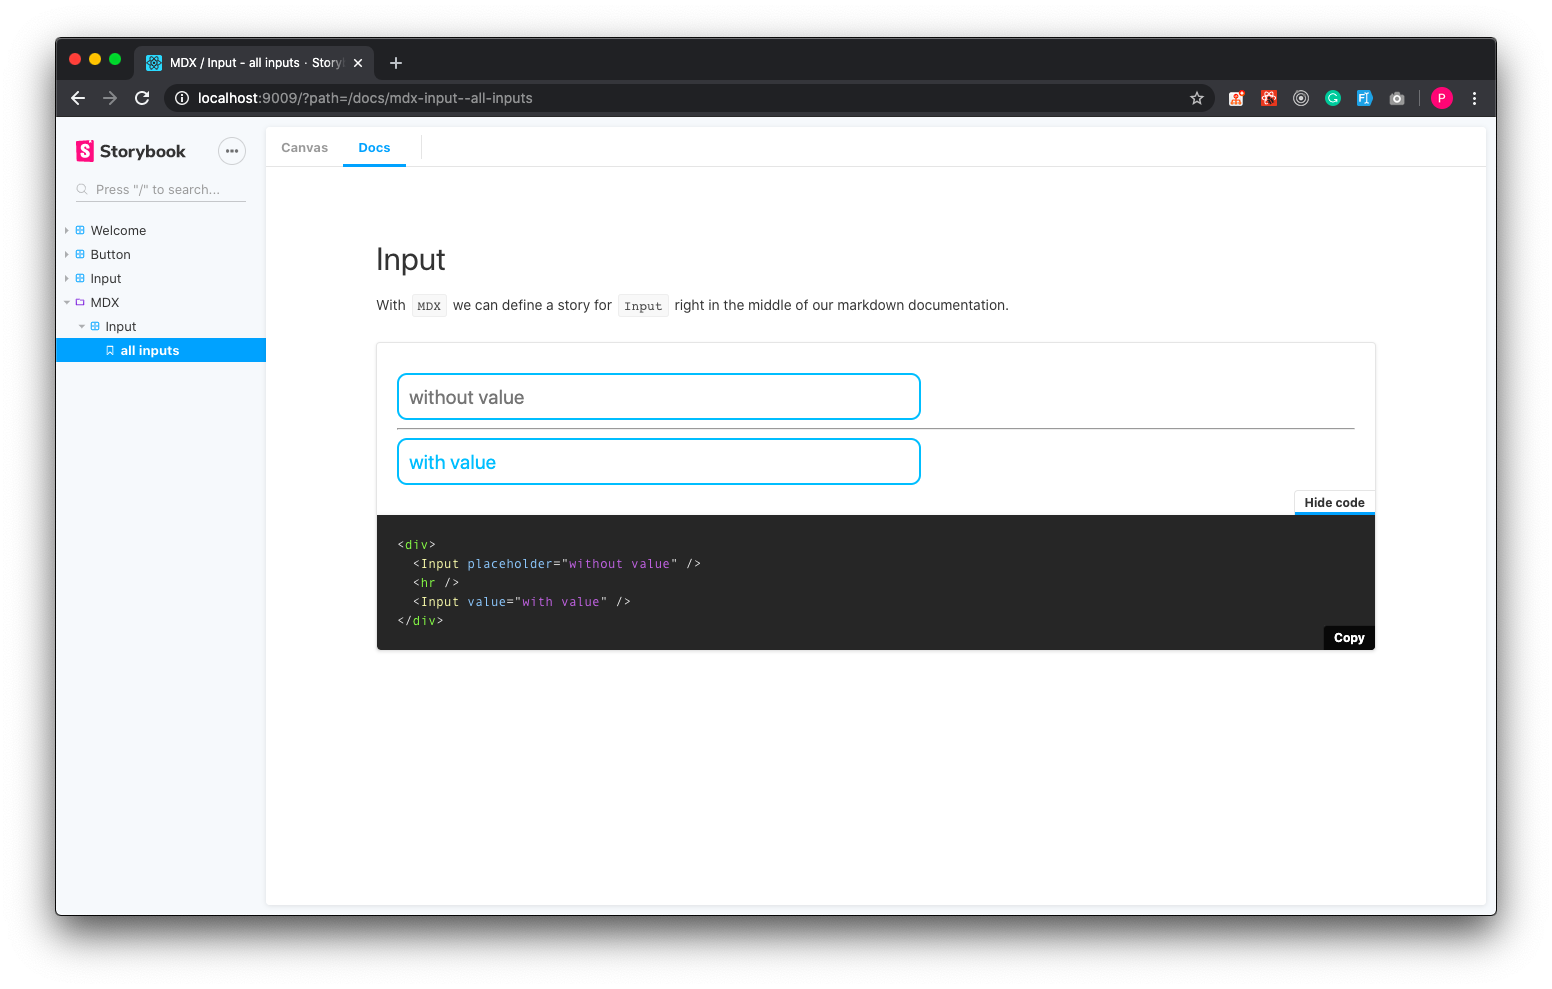
ทีนี้เราก็ก็ลองสร้างไฟล์ document ของ input component ง่ายๆ ดู
<!-- src/stories/Input.stories.mdx -->
import { Meta, Story, Preview } from '@storybook/addon-docs/blocks';
import Input from '../components/Input' <Meta title="MDX/Input" component={Input} /> # Input
With `MDX` we can define a story for `Input` right in the middle of our
markdown documentation. <Preview> <Story name="all inputs">   <div>     <Input placeholder="without value" />     <hr />     <Input value="with value" />   </div> </Story></Preview>
เมื่อเรา restart Storybook จะพบว่ามี document ของ input component ที่เราสร้างแล้ว
บทสรุป
Storybook เป็น tool ที่ช่วยให้เราสร้าง design system / UI library ได้ง่ายขึ้น แล้วก็มี addon มากมายให้เลือกใช้ อีกทั้งยังรอบรับหลาย framework ซึ่งในบทความนี้เป็นเพียงการสอนการทำ Storybook แบบง่ายๆ เท่านั้น ซึ่งหากทุกท่านสนใจสามารถลองเอาไปพัฒนาต่อได้
ติดตามบทความอื่นๆ จากเราได้ที่ SennaLabs Blogs

Share

Keep me postedto follow product news, latest in technology, solutions, and updates
Related articles
Explore all
